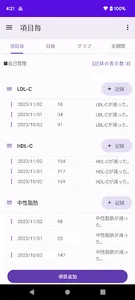
You can specify the date and record the results of the blood test.
Record blood test results and display them in a graph.
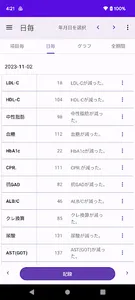
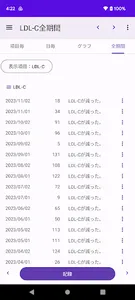
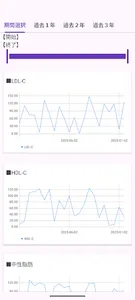
You can check the blood test results for each record in a line graph.
▼ Record blood test results
1. tap the record button
2. Tap the blood test result item.
Long tap/long press to set the current date.
3. Select the blood test date and tap Next.
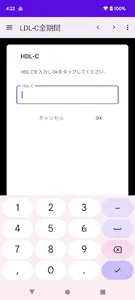
4. Enter the measured value and tap OK.
5. Enter a note and tap OK.
6. Confirm and tap Done.
▼Blood test results (for each record)
Tap the upper graph to display a line graph of blood test results for each record.
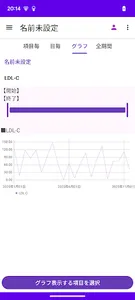
▼Item name change/delete/setting
Tap each item at the top.
Tap the icon on the left side of the item name to open the menu.
The menu has the following items.
- Item name change
・Move up
・Move down
・Item settings
·delete
The item settings include the following items.
・Input numerical value
・Graph display
・Enter memos, etc.
・Date display
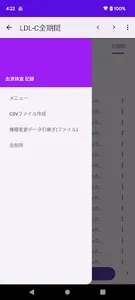
▼Transfer of model change data
Tap "Model change data transfer" in the menu to display the following selection screen.
・File creation (create a backup file for model change)
・Restore (restore data from backup file)
Step A. Steps to create a backup file
1.Tap "Model change data transfer" in the menu.
2. Tap Create file.
3. Tap "Create file" on the confirmation screen.
4. Tap "Select app" on the send screen.
5. Tap “Save to Drive”.
* Internet connection is required to save to the drive.
Step B. Restore (restore data from backup file in step A)
1. Install this app on your new smartphone/tablet from google play. Launch the app.
2.Tap "Model change data transfer" in the menu.
3. Tap Restore.
4. Tap Drive.
5. Tap My Drive.
6. From the file list, tap the file to restore.
Tap "Sort" from the menu on the upper right to sort by "Modified date (newest first)".
■ If the app does not open after changing the model
Please try steps 1-5 below on your new smartphone/tablet.
Procedure 1. Long press/long tap the app icon.
Procedure 2. Tap App info.
Step 3. Tap "Storage & Cache".
Step 4. Tap "Clear Storage".
Step 5. Start the app and restore from "Transfer model change data" -> restore -> file selection.
Record blood test results and display them in a graph.
You can check the blood test results for each record in a line graph.
▼ Record blood test results
1. tap the record button
2. Tap the blood test result item.
Long tap/long press to set the current date.
3. Select the blood test date and tap Next.
4. Enter the measured value and tap OK.
5. Enter a note and tap OK.
6. Confirm and tap Done.
▼Blood test results (for each record)
Tap the upper graph to display a line graph of blood test results for each record.
▼Item name change/delete/setting
Tap each item at the top.
Tap the icon on the left side of the item name to open the menu.
The menu has the following items.
- Item name change
・Move up
・Move down
・Item settings
·delete
The item settings include the following items.
・Input numerical value
・Graph display
・Enter memos, etc.
・Date display
▼Transfer of model change data
Tap "Model change data transfer" in the menu to display the following selection screen.
・File creation (create a backup file for model change)
・Restore (restore data from backup file)
Step A. Steps to create a backup file
1.Tap "Model change data transfer" in the menu.
2. Tap Create file.
3. Tap "Create file" on the confirmation screen.
4. Tap "Select app" on the send screen.
5. Tap “Save to Drive”.
* Internet connection is required to save to the drive.
Step B. Restore (restore data from backup file in step A)
1. Install this app on your new smartphone/tablet from google play. Launch the app.
2.Tap "Model change data transfer" in the menu.
3. Tap Restore.
4. Tap Drive.
5. Tap My Drive.
6. From the file list, tap the file to restore.
Tap "Sort" from the menu on the upper right to sort by "Modified date (newest first)".
■ If the app does not open after changing the model
Please try steps 1-5 below on your new smartphone/tablet.
Procedure 1. Long press/long tap the app icon.
Procedure 2. Tap App info.
Step 3. Tap "Storage & Cache".
Step 4. Tap "Clear Storage".
Step 5. Start the app and restore from "Transfer model change data" -> restore -> file selection.
Show More